 Save
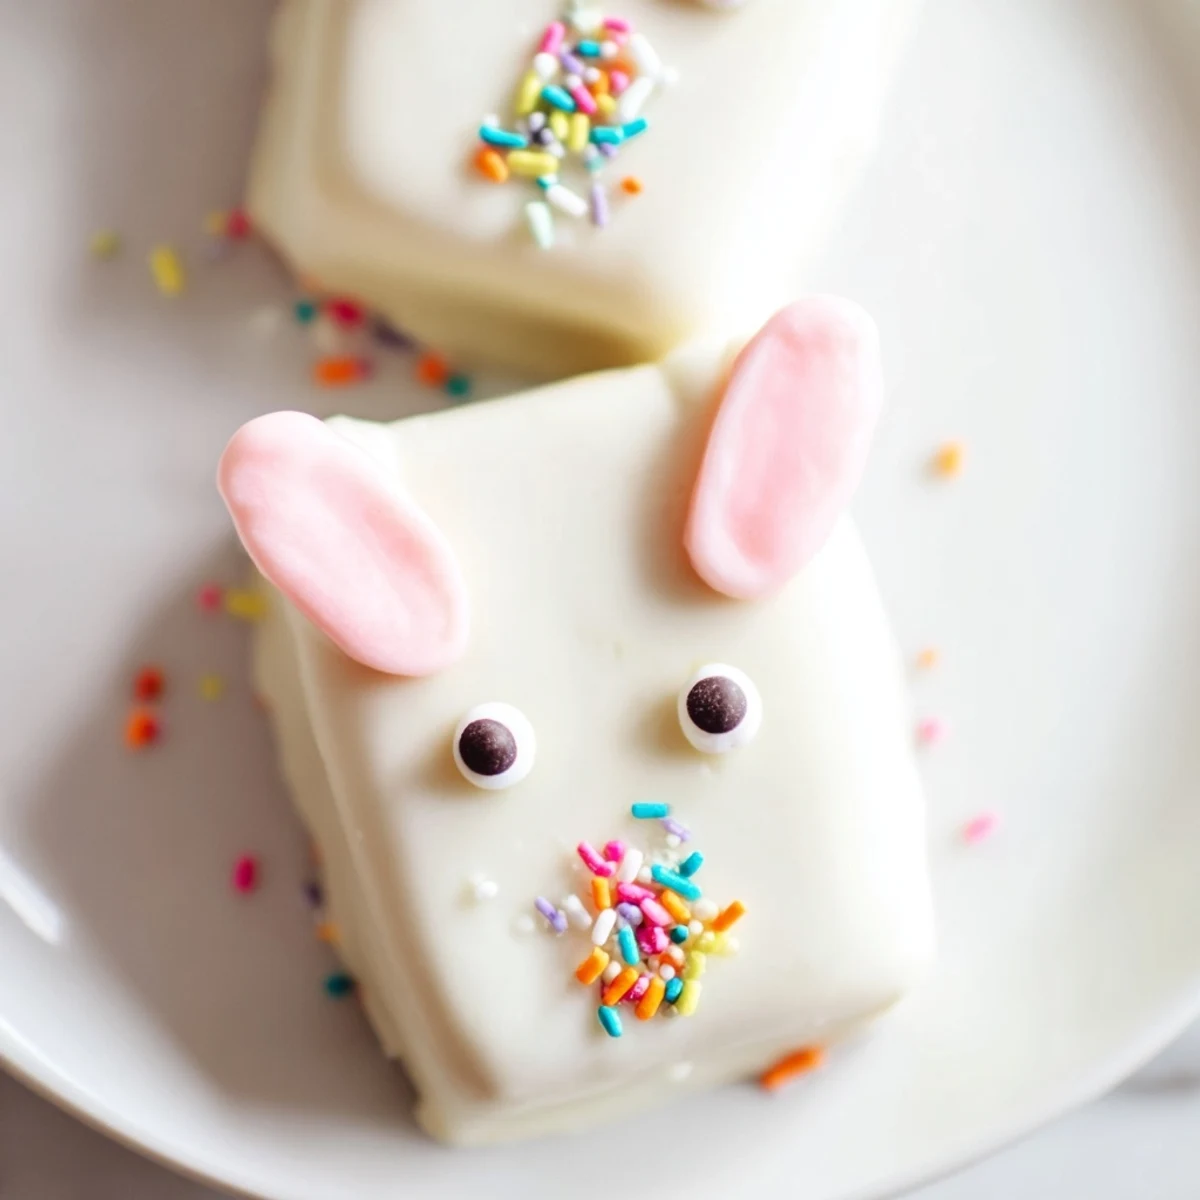
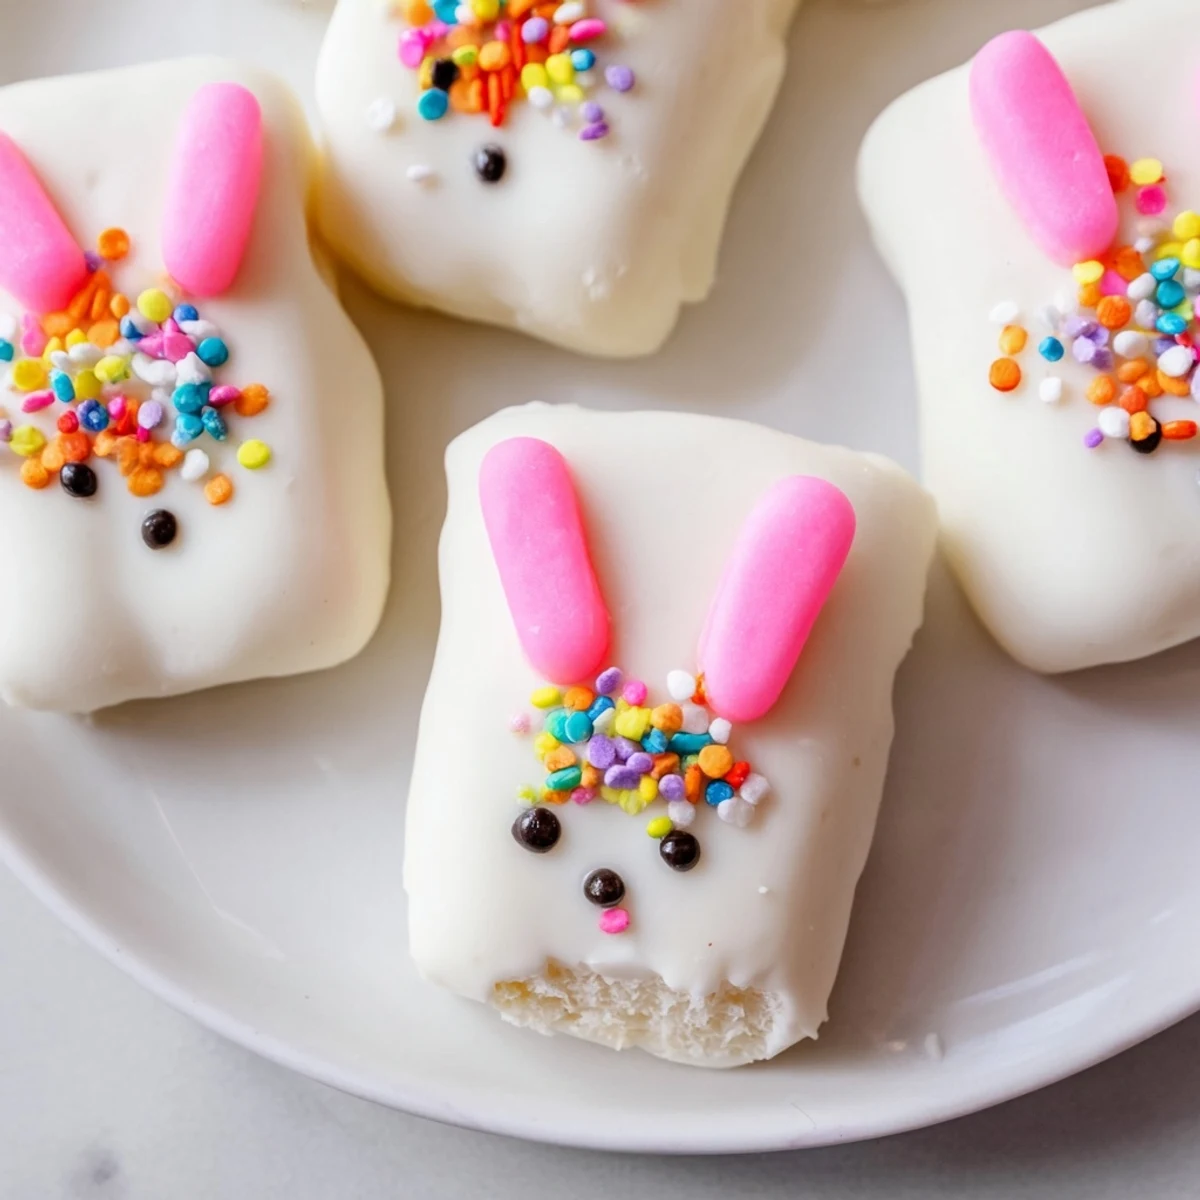
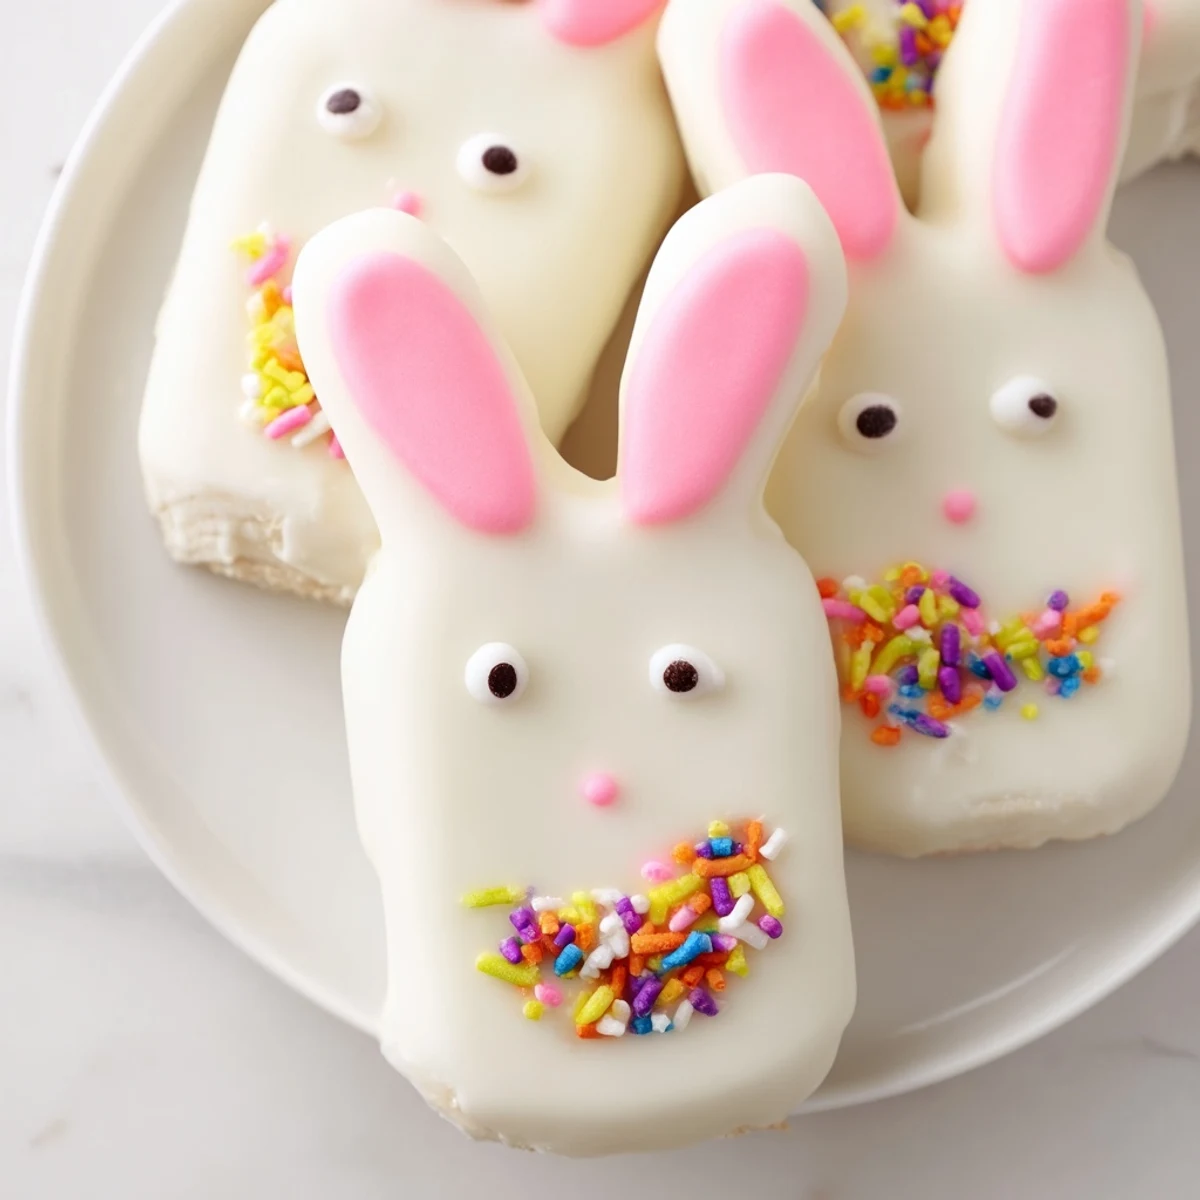
Save These charming bunny-shaped cakesicles combine moist vanilla cake with a rich white chocolate coating for an irresistible Easter treat. The simple process involves mixing cake crumbs with cream cheese, butter, and vanilla to create a dough that shapes perfectly into festive bunny faces. After chilling, dip each shape into melted white chocolate and decorate with candy eyes, sprinkles, or fondant features to bring these adorable treats to life.
Perfect for spring gatherings, these handheld desserts offer endless customization options from different cake flavors to colorful marbled chocolate effects. Each cakesicle delivers 220 calories of sweet indulgence, making them ideal for Easter baskets, dessert tables, or thoughtful homemade gifts.
The kitchen counter was covered in white chocolate splatters when my niece walked in, eyes wide at the chaos. She immediately wanted to help make Easter treats with me, and these bunny cakesicles became our messy, magical afternoon project. Something about dipping cake into melted chocolate brings out the kid in everyone.
Last Easter, I made three dozen of these for a neighborhood gathering and watched grown adults fight over the last bunny with the pink nose. One friend confessed she ate two before dinner even started and hid the evidence in her purse. Now they are the most requested item at every spring celebration I host.
Ingredients
- 1 cup vanilla cake crumbs: These can come from leftover cake, cupcakes, or even a store-bought vanilla cake broken down into fine crumbs
- 2 tbsp cream cheese: This acts as the binding agent that holds everything together while adding a subtle tang
- 1 tbsp unsalted butter: Softened to room temperature so it blends seamlessly into the mixture
- 2 tbsp powdered sugar: Just enough sweetness to balance the cream cheese without making the filling too sweet
- 1/2 tsp vanilla extract: Pure vanilla extract gives the best flavor, but imitation works in a pinch
- 10 oz white chocolate or white chocolate melts: Candy melts are easier to work with for coating, but good quality white chocolate tastes superior
- Edible gel food coloring: Pink and yellow work beautifully for bunny features, though any pastel colors feel appropriately festive
- 8 cakesicle sticks: Make sure these are food-grade and long enough to give a good grip when dipping
- Sprinkles, candy eyes, or fondant decorations: These are where the personality comes in, so go wild with whatever catches your eye
Instructions
- Mix the cake base:
- Combine cake crumbs, cream cheese, butter, powdered sugar, and vanilla in a medium bowl until the mixture holds together like soft dough
- Shape your bunnies:
- Divide into 8 portions and form each into a flattened oval with slightly pointed ears at the top
- Add the sticks:
- Gently insert a cakesicle stick into the bottom of each shape, pressing carefully to secure without cracking
- Chill thoroughly:
- Refrigerate for 20 to 30 minutes until firm to the touch, which prevents them from falling apart during dipping
- Melt the coating:
- Heat white chocolate in a microwave-safe bowl in 30-second bursts, stirring between each until completely smooth
- Dip and coat:
- Submerge each cakesicle in melted chocolate, tap gently to remove excess, and place on parchment paper
- Decorate immediately:
- Add candy eyes, sprinkles, or fondant features while the chocolate is still soft so everything adheres properly
- Set completely:
- Let the coating harden at room temperature or refrigerate briefly, then add final details with food coloring gel
 Save
Save My daughter now requests these for every school event and birthday, insisting that bunnies are appropriate year-round. We have made them with pink ears for Valentine's Day and red noses for Christmas. Some traditions are too delightful to limit to one season.
Making Them Ahead
You can prepare the cake mixture and shape the bunnies up to two days in advance, keeping them tightly wrapped in the refrigerator. This makes the actual dipping and decorating much less stressful when you are pressed for time before a party.
Coating Troubleshooting
White chocolate can seize and become grainy if even a drop of water gets into it. If this happens, stir in a teaspoon of vegetable oil to smooth it out again. Work in a dry environment and never cover the melting bowl with a wet lid.
Decoration Ideas That Work
Fondant ears hold their shape beautifully and can be made days in advance. Candy eyes are adorable but sometimes slide off angled surfaces, so press them gently into the soft chocolate. A tiny pink confetti sprinkle makes the perfect nose.
- Pretzel sticks dipped in pink coating create charming ears that add a salty contrast to the sweet
- Shredded coconut tinted with green food coloring makes whimsical Easter grass for serving
- Keep a clean toothbrush handy to flick specks of contrasting chocolate onto the coating for a speckled egg effect
 Save
Save These bunny cakesicles have a way of making people smile before they even take a bite, which might be the best ingredient of all.
Recipe FAQs
- → How long do these cakesicles stay fresh?
-
Store your bunny cakesicles in an airtight container in the refrigerator for up to 3 days. The cool temperature helps maintain the white chocolate coating and keeps the cake filling fresh and moist.
- → Can I use different cake flavors?
-
Absolutely! While vanilla cake crumbs create a classic base, you can experiment with chocolate, lemon, red velvet, or spice cake. The creamy filling balances beautifully with various cake flavors for unique taste combinations.
- → What's the best way to melt white chocolate?
-
Melt white chocolate in a microwave-safe bowl using 30-second intervals, stirring thoroughly between each burst. This gradual approach prevents scorching and ensures smooth, silky consistency perfect for coating your bunny shapes.
- → Do I need a special cakesicle mold?
-
While a cakesicle mold creates perfectly uniform shapes, it's not essential. You can hand-shape the cake mixture into flattened bunny face forms using your hands or a cookie cutter. The mold just makes the process faster and more consistent.
- → How can I make the bunny decorations stand out?
-
Use edible gel food coloring to create pink noses and ears, attach candy eyes with tiny dots of melted chocolate, or cut fondant shapes for detailed features. Sprinkles, edible glitter, and colored chocolate drizzles add festive flair and dimension.
- → Can these be made ahead for Easter?
-
Yes! Prepare your cakesicles up to 2 days in advance and store them refrigerated in an airtight container. The flavors actually improve slightly as the cake filling melds with the white chocolate coating. Add final delicate decorations like fondant ears the day of serving for best results.
