 Save
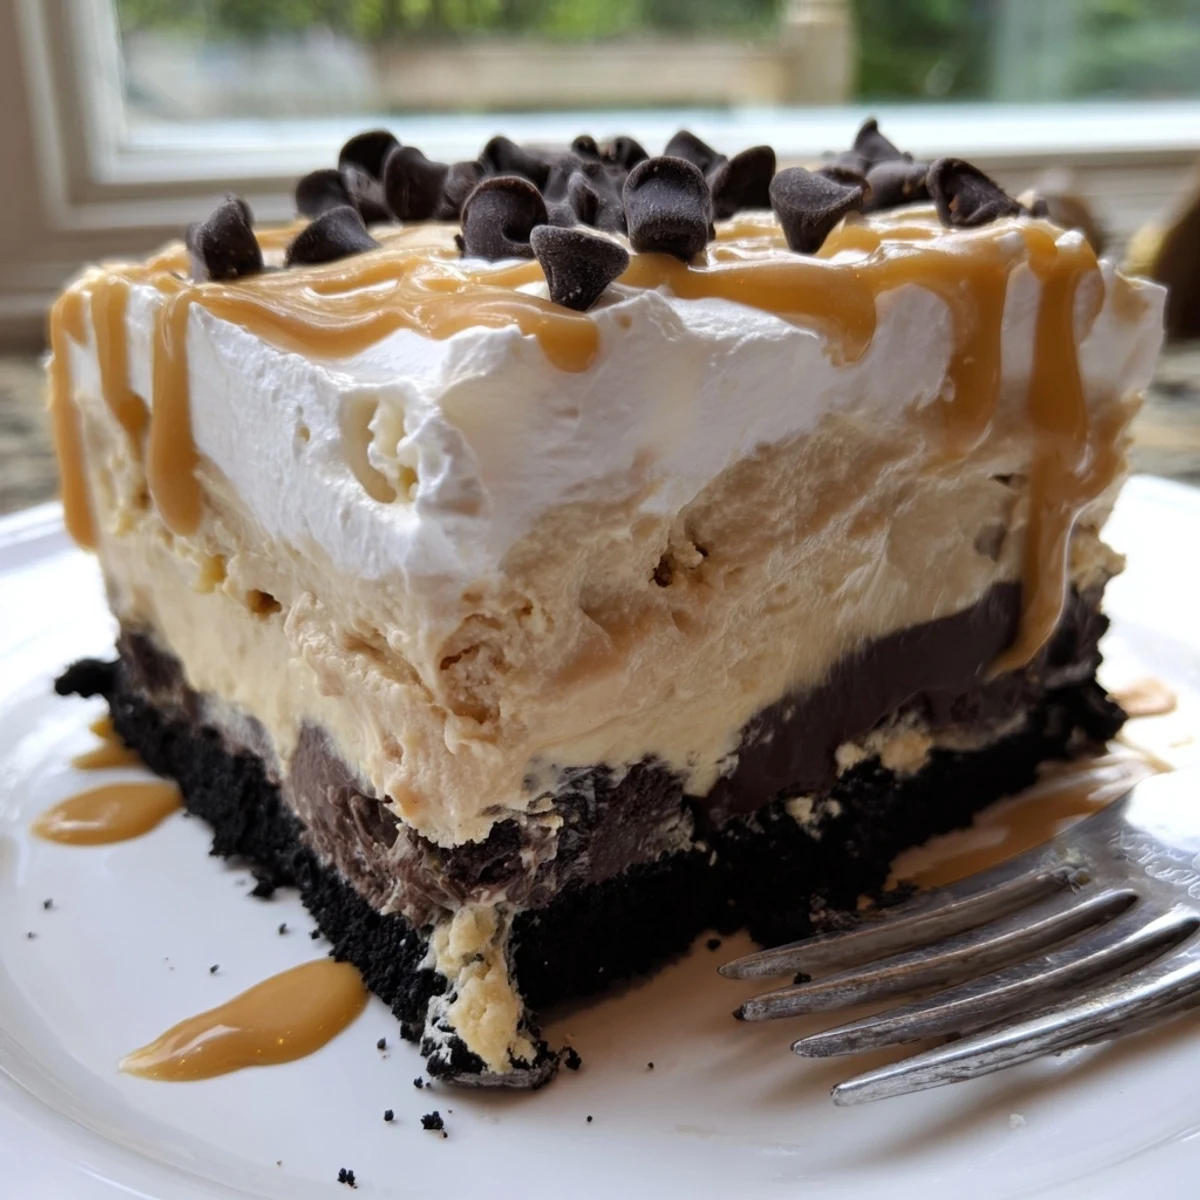
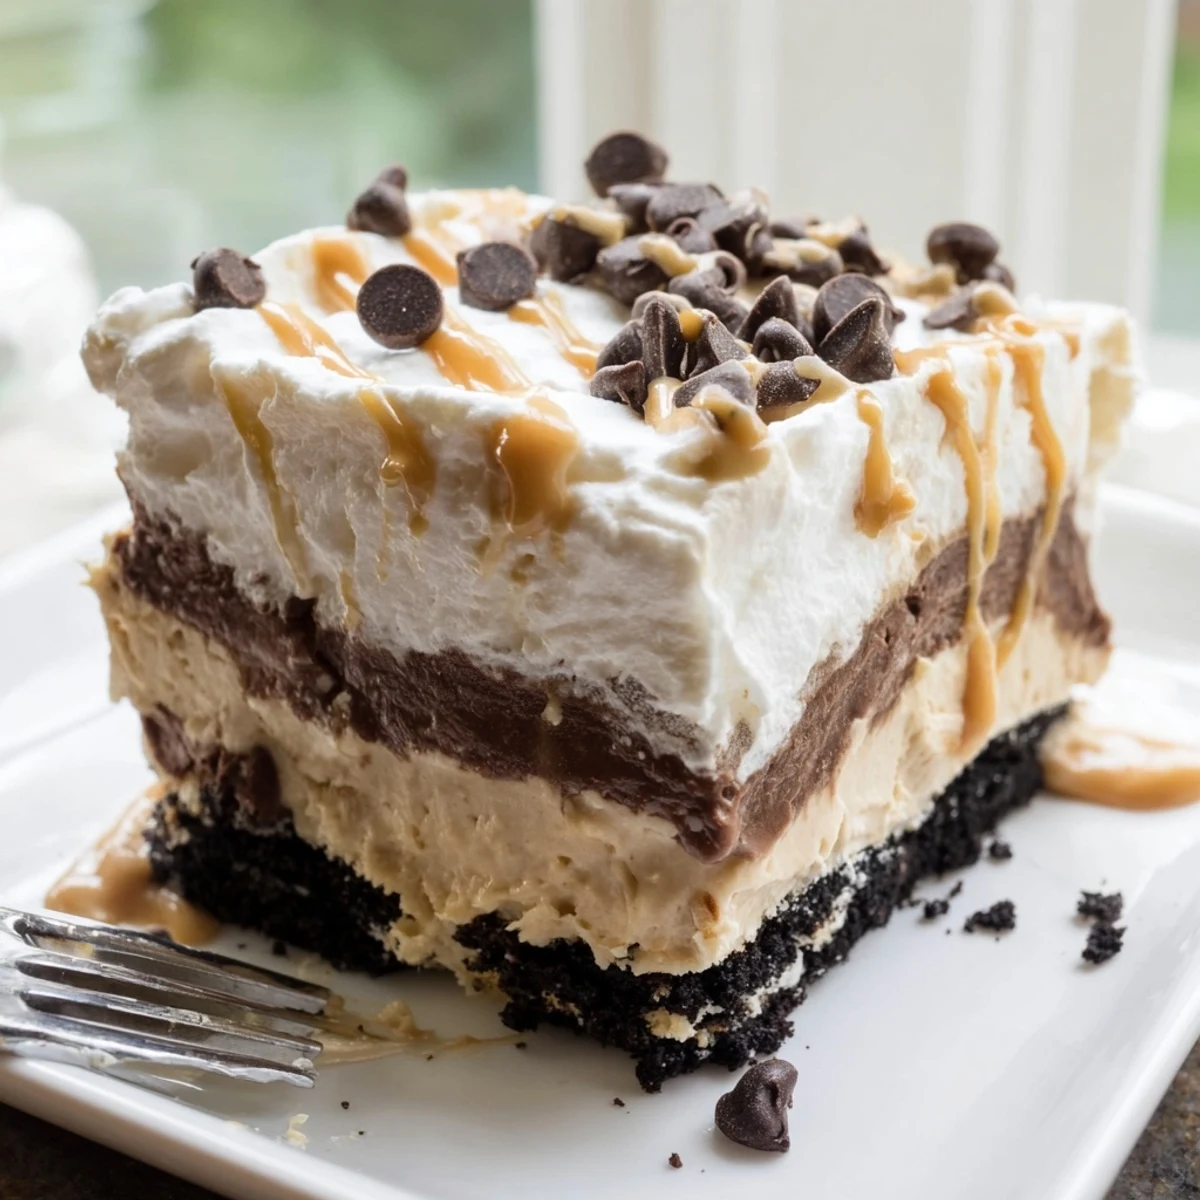
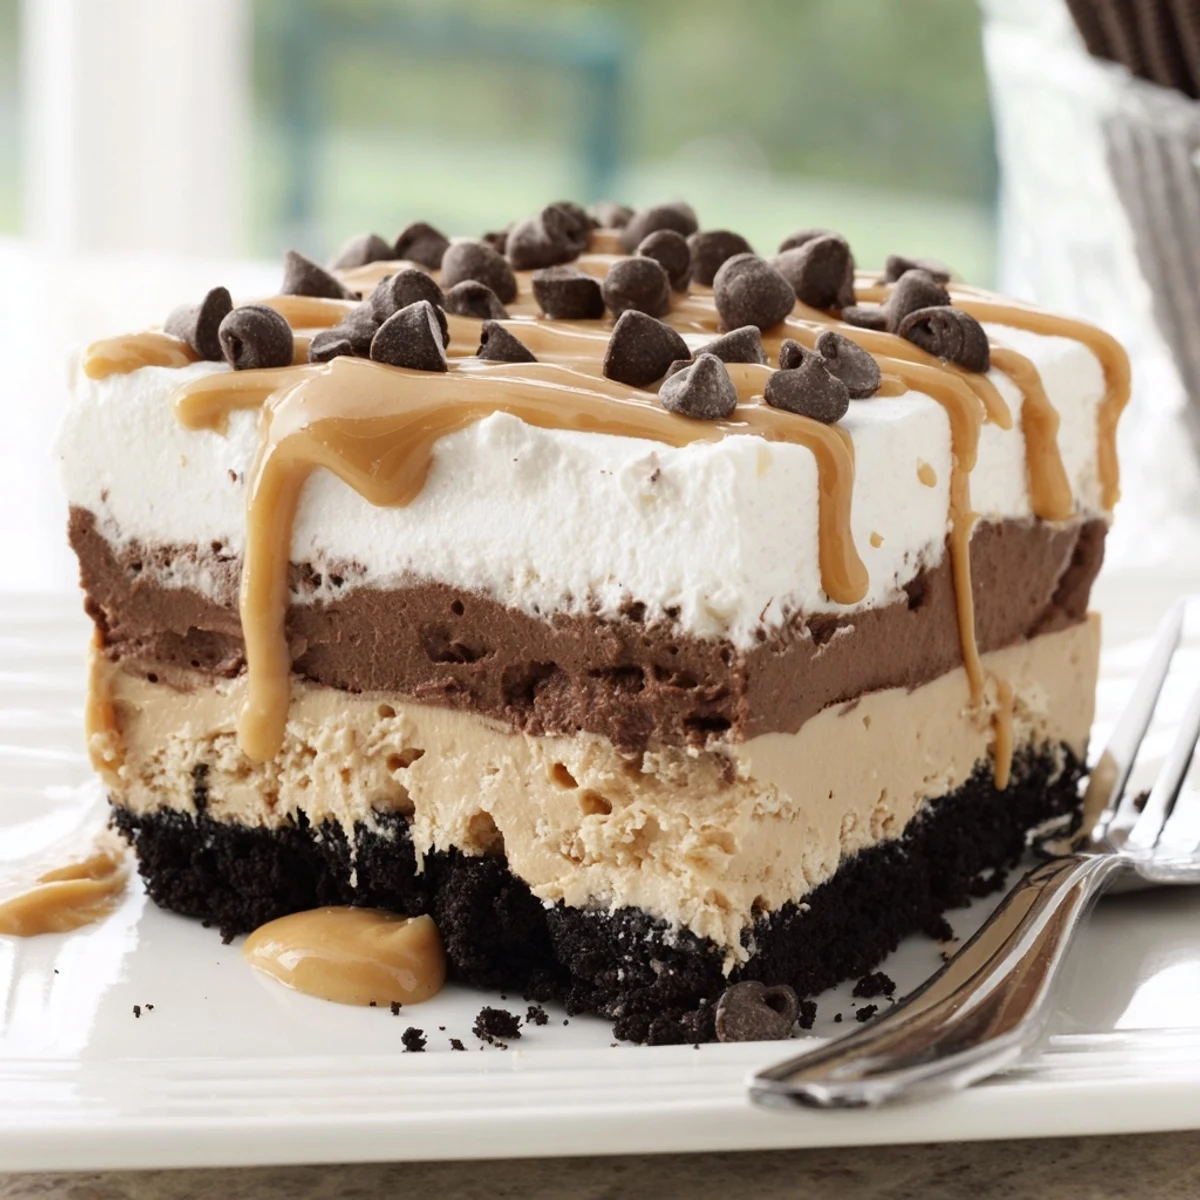
Save This no-bake layered dessert combines a crunchy chocolate cookie crust with a velvety peanut butter cream cheese layer, rich chocolate pudding, and fluffy whipped topping.
Ready in just 25 minutes of prep, it chills to perfection in the fridge for a crowd-pleasing treat that serves eight.
Drizzle with melted peanut butter and chocolate shavings for an irresistible finish.
My sister brought this dessert to a Fourth of July cookout three years ago and I genuinely could not stop going back for slivers until a quarter of the pan had mysteriously vanished. Something about the cold, creamy layers hitting that chocolate cookie crust makes it impossible to eat just one square. I begged her for the recipe on the drive home and have since made it for potlucks, birthdays, and honestly random Tuesdays when the peanut butter craving hits hard.
I made this for my coworker Margos going away party and she actually teared up, not because she was leaving but because she said it tasted exactly like something her grandmother used to make. People lingered around the dessert table far longer than anyone expected, scraping the edges of the dish with their forks.
Ingredients
- Chocolate sandwich cookies (200 g, crushed): Oreos are the classic choice here and the filling actually helps bind the crust together, so do not bother removing it.
- Unsalted butter (75 g, melted): This is what sets the crust, so make sure it is fully melted and evenly mixed through the crumbs.
- Cream cheese (225 g, softened): Let it sit out for at least thirty minutes because cold cream cheese will leave ugly lumps in your peanut butter layer.
- Creamy peanut butter (120 g): Use a standard commercial brand like Jif or Skippy since natural peanut butter tends to separate and create an oily texture.
- Powdered sugar (100 g): Sift it if yours is clumpy, otherwise you will get little white streaks in that beautiful golden layer.
- Whipped topping (480 ml total, thawed): One large tub of Cool Whip covers both the peanut butter mixture and the final topping, and yes it needs to be fully thawed before you work with it.
- Instant chocolate pudding mix (1 package, 100 g): The instant kind is critical here since cooked pudding would melt the layer beneath it.
- Cold milk (375 ml): Whole milk gives the richest pudding texture but any milk will technically work in a pinch.
- Melted peanut butter for drizzling and chocolate shavings (optional): These finishing touches take the presentation from backyard potluck to bakery window.
Instructions
- Build the crust foundation:
- Toss your crushed cookies with melted butter until the mixture feels like damp sand that holds together when you squeeze it. Press it firmly and evenly into your baking dish using the back of a measuring cup or your knuckles, then pop it in the fridge to firm up while you move on.
- Whip up the peanut butter layer:
- Beat the softened cream cheese, peanut butter, and powdered sugar together until completely smooth with no streaks visible. Gently fold in the whipped topping with a spatula rather than stirring aggressively, which would deflate all that lovely airiness, then spread it over your chilled crust.
- Create the chocolate pudding layer:
- Whisk the instant pudding mix and cold milk together for about two minutes until it thickens noticeably and coats the back of a spoon. Pour it gently over the peanut butter layer and use your spatula to spread it into an even coat without pressing down into the layer below.
- Finish and freeze your masterpiece:
- Spread the remaining whipped topping over the pudding in smooth swoops and peaks, then drizzle with melted peanut butter and scatter chocolate shavings if you are feeling fancy. Cover the dish loosely with plastic wrap and refrigerate for at least three hours so every layer sets properly.
- Slice and serve:
- Use a sharp knife dipped in hot water and wiped clean between cuts for the neatest squares. Serve chilled and watch people close their eyes on the first bite.
 Save
Save The best part of making this dessert is the quiet moment after you spread the final layer of whipped topping and everything looks pristine and perfect before anyone digs in. I always stand back and admire it for a second, maybe snap a photo, because within ten minutes of serving it always looks like a delicious crime scene.
When to Bring This Out
This is my go to when I need to feed a crowd but have zero interest in turning on the oven or doing anything fussy. It travels well if you keep it chilled in a cooler bag, and it actually tastes better on day two when the flavors have really mingled together overnight.
Swaps That Actually Work
Gluten free chocolate sandwich cookies make this celiac friendly with almost zero detectable difference in taste or texture. You can also fold chopped roasted peanuts between any of the layers for crunch, or swap the whipped topping for stabilized homemade whipped cream if you prefer a richer, less sweet finish.
A Few Final Thoughts
After making this at least a dozen times I have learned a handful of small things that make a big difference in the final result.
- Run your knife under hot water and dry it between each slice for bakery clean edges.
- Taste your peanut butter layer before spreading it because different brands vary in salt and sweetness.
- Always verify ingredient labels for allergens if you are serving a crowd, since this contains dairy, peanuts, wheat, and often soy.
 Save
Save Keep it chilled until the moment you serve it, share it generously, and do not be surprised when people ask you for the recipe. It has a way of becoming everyones most requested contribution.
Recipe FAQs
- → Can I make this dessert ahead of time?
-
Yes, this dessert is ideal for making ahead. It can be stored in the refrigerator for up to 3 days covered tightly with plastic wrap. The layers actually set and meld together beautifully overnight.
- → Can I use natural peanut butter instead of creamy?
-
Standard creamy peanut butter works best for a smooth, stable layer. Natural peanut butter tends to separate and may make the filling too oily or loose. If using natural, stir it very well and consider adding a bit more powdered sugar to help bind.
- → How do I get clean slices when serving?
-
Use a sharp knife and wipe it clean between each cut. For the neatest squares, you can also dip the knife in hot water, dry it quickly, then slice. Chilling the dessert for the full 3 hours ensures it holds its shape.
- → Can I freeze this layered dessert?
-
Freezing is not recommended as the whipped topping and pudding layers may become grainy or separate upon thawing. It is best enjoyed fresh from the refrigerator within 3 days of preparation.
- → What can I substitute for whipped topping?
-
You can use an equal amount of homemade whipped cream. Whip 240 ml of heavy cream with 2 tablespoons of powdered sugar until stiff peaks form. Keep in mind the dessert may be slightly softer and should be served soon after assembling.
- → How can I make this gluten-free?
-
Simply swap the chocolate sandwich cookies for a gluten-free variety and use a gluten-free pudding mix. Always double-check all ingredient labels to ensure they are certified gluten-free.
