 Save
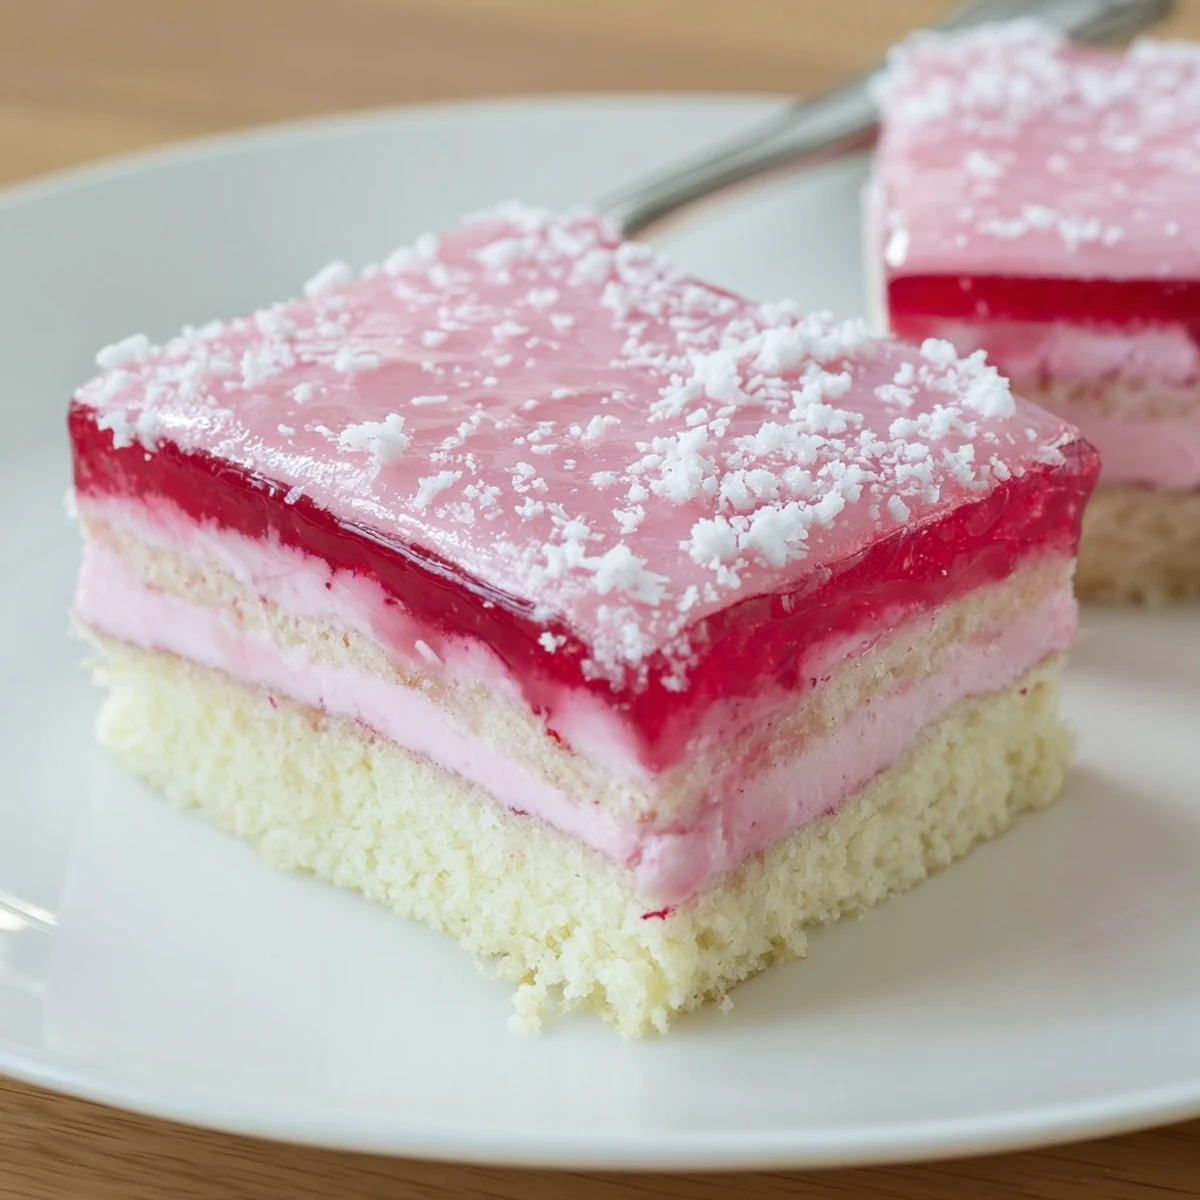
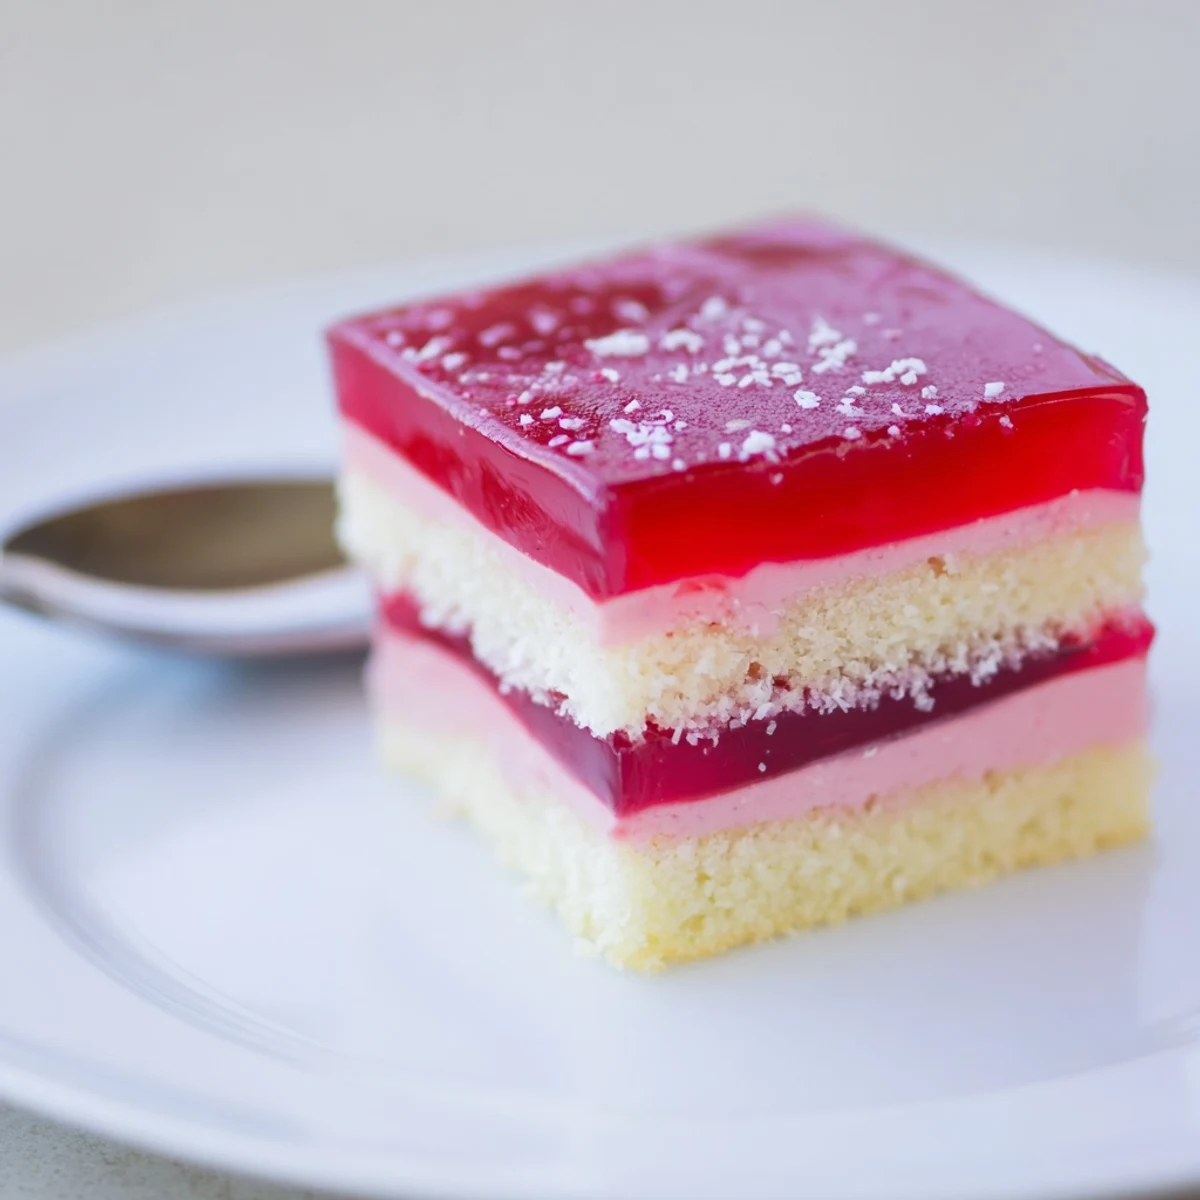
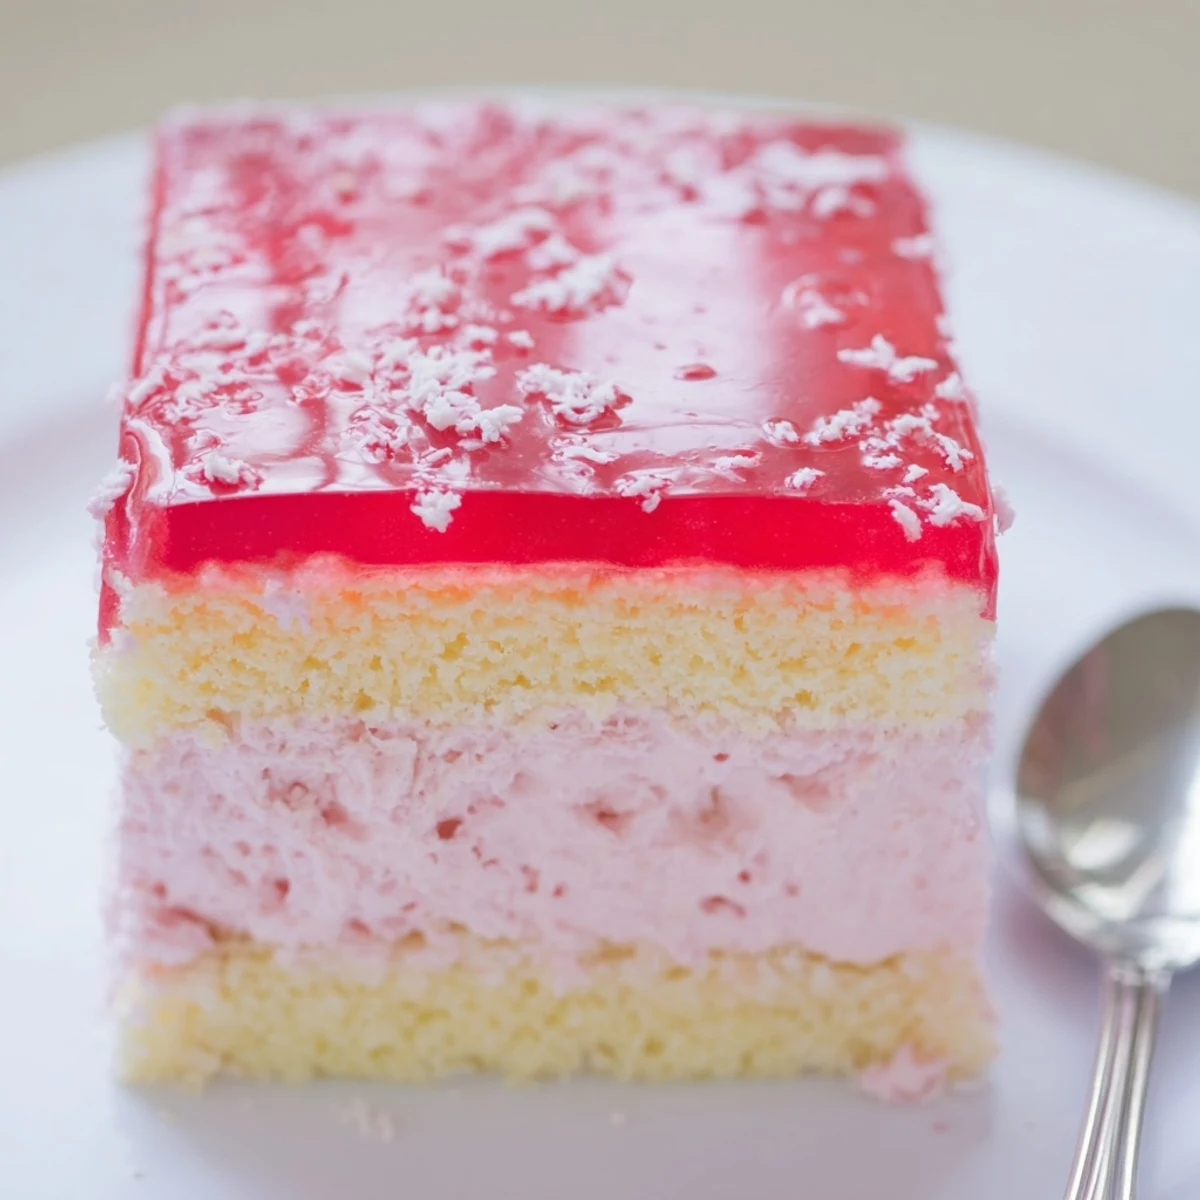
Save These nostalgic pink jelly cakes begin with a thin self-raising sponge baked in a sheet, cooled and cut into 24 squares. Whipped cream sandwiched between two squares is dipped into semi-set raspberry jelly to give a glossy pink coating, then rolled in desiccated coconut. Allow jelly to semi-set before dipping (about 45-60 minutes), bake 12-15 minutes and chill 30 minutes to finish. Serve chilled for afternoon tea; yields 12 cakes.
My grandmother's kitchen smelled like coconut and raspberries every Saturday afternoon, and I never understood the magic until she let me dunk my first sponge square into that wobbly pink jelly. The cake nearly fell apart in my clumsy hands, but she just laughed and said that was part of the charm. Pink jelly cakes are a truly Australian tradition, born from CWA meetings and country bake sales, and they deserve a place in every home cook's repertoire.
I once brought a plate of these to a friend's baby shower and watched three women immediately close their eyes after the first bite, transported straight back to their childhoods. That reaction is worth every minute of chilling and dipping.
Ingredients
- Unsalted butter (125 g): Softened butter is the foundation of a tender sponge, so pull it out of the fridge an hour before you start.
- Caster sugar (125 g): The fine texture dissolves quickly into the butter, giving you that silky, pale mixture you are aiming for.
- Large eggs (2): Room temperature eggs incorporate more evenly and help the cake rise without collapsing.
- Vanilla extract (1 tsp): A good quality extract adds warmth without masking the jelly flavor later.
- Self-raising flour (180 g), sifted: Sifting is not optional here, because it aerates the flour and keeps the sponge light.
- Milk (100 ml): Whole milk loosens the batter just enough to achieve that signature soft crumb.
- Raspberry or strawberry jelly crystals (1 packet, 85 g): This is where the pink magic happens, and raspberry gives the best balance of sweet and tart.
- Boiling water (250 ml) and cold water (150 ml): Dissolving the crystals in boiling water first ensures no grainy bits remain in your coating.
- Thickened cream (200 ml): You need a cream that holds its shape when whipped, so avoid pouring cream.
- Icing sugar (1 tbsp): Just a touch sweetens the filling without making it cloying.
- Vanilla extract (1/2 tsp) for filling: A second dose in the cream ties the whole cake together.
- Desiccated coconut (100 g): Fine coconut clings better than shredded, giving you an even, snow-like coating.
Instructions
- Prepare your oven and tin:
- Preheat the oven to 180 degrees C (350 degrees F) and grease then line a 20cm x 30cm baking tin with baking paper. Getting this right means your sponge releases cleanly every time.
- Cream butter and sugar:
- Beat the softened butter and caster sugar with an electric mixer until the mixture turns pale, fluffy, and almost white. This usually takes about three minutes, and you will feel the change in texture through the bowl.
- Add eggs and vanilla:
- Beat in the eggs one at a time, waiting until each is fully absorbed before adding the next, then pour in the vanilla. If the mixture looks like it is starting to curdle, add a tablespoon of your sifted flour to bring it back.
- Fold in flour and milk:
- Alternately fold in the sifted flour and milk using a large spoon or spatula, starting and ending with flour. Stop as soon as everything is combined, because overmixing will knock the air out.
- Bake the sponge:
- Spread the batter evenly into your prepared tin and bake for 12 to 15 minutes until the top springs back lightly and a skewer inserted in the center comes out clean. Cool in the tin for 10 minutes, then gently turn the sponge onto a wire rack to cool completely.
- Set the jelly:
- While the sponge cools, dissolve the jelly crystals in boiling water, stir until completely clear, then add the cold water. Pour into a shallow dish and refrigerate for about 45 to 60 minutes until it is just beginning to set but still liquid enough to coat a spoon.
- Cut and fill:
- Cut the cooled sponge into 24 equal squares using a serrated knife. Whip the cream with icing sugar and vanilla to firm peaks, then sandwich the squares together in pairs with a generous spoonful of cream.
- Dip and roll:
- Working quickly, dip each sandwiched cake into the semi-set jelly, coating all sides, and let the excess drip off for a second or two. Roll immediately in desiccated coconut, place on a wire rack, and refrigerate for at least 30 minutes before serving.
 Save
Save The moment you lift a finished jelly cake off the rack, coconut dusting your fingers, and see that pink jelly glistening through, you realize you have made something that is far more than the sum of its parts.
Getting the Jelly Consistency Right
The trickiest part of this entire recipe is catching the jelly at exactly the right moment, because too runny and it soaks the sponge into mush, too firm and it will not coat evenly. I set a timer for 40 minutes and start checking every five minutes after that by dragging a finger through the surface. You want it to feel like thick syrup with the faintest skin forming on top. On a hot day, it may set faster than you expect, so keep a close eye on it.
Making Them Your Own
Part of the joy of jelly cakes is playing with flavors once you have mastered the classic raspberry version. Passionfruit jelly gives a tropical twist that tastes like summer, and orange jelly creates a creamsicle effect that children absolutely adore. You could even split your batch and use two different jelly flavors for a colorful afternoon tea spread.
Serving and Storing
These cakes are undeniably at their best on the day they are made, when the sponge is still soft and the jelly coating is fresh and jewel-like. If you need to store them, cover loosely and keep refrigerated, but bring them out fifteen minutes before serving so the sponge can soften again.
- Always serve on a pretty plate or tiered stand, because the visual is half the experience.
- Dust your hands with a little extra coconut before handling to prevent sticking.
- Remember that homemade always looks slightly imperfect and rustic, which is exactly how it should be.
 Save
Save Every pink jelly cake you make carries a little piece of Australian kitchen history, and sharing them with someone who has never tasted one before is a genuine joy. Go slowly, enjoy the mess, and eat at least one while standing at the counter before anyone else arrives.
Recipe FAQs
- → How do I tell when the jelly is ready for dipping?
-
The jelly should be thick and tacky but still pourable — not fully set. Chill the dissolved jelly in a shallow dish for about 45–60 minutes and test by stirring: it should coat the back of a spoon and leave a trail when dragged.
- → Can these be made ahead of time?
-
Yes. Assemble and coat the cakes, then refrigerate for up to 24 hours. For best texture, make on the day you plan to serve; chilling helps the coating set but extended storage can soften the sponge.
- → How can I make a dairy-free version?
-
Swap thickened cream for chilled whipped coconut cream and use dairy-free butter in the sponge. Ensure the coconut cream is firm when whipping to hold the sandwiches together during dipping.
- → Why is the sponge baked thinly?
-
A thin sheet sponge keeps the cakes light and proportionate to the jelly coating and cream filling. It also bakes quickly (12–15 minutes) and absorbs less moisture, helping the coating stay intact.
- → How do I prevent the jelly from soaking into the sponge?
-
Cool the sponge completely before assembling and use the jelly at the semi-set stage so it forms a surface glaze rather than a liquid that soaks in. Let excess jelly drip off before rolling in coconut.
- → What flavour variations work well?
-
Swap raspberry for passionfruit or orange jelly for a bright twist, or add citrus zest to the whipped cream. Adjust sweetness to taste when using more tart jelly flavours.
